
Okay, let's talk about the main event. People travel from all over the world to see a Hawaiian sunset, and Anaehoʻomalu Bay consistently ranks as one of the best stages on the Big Island for this daily spectacle. It's more than just a sunset. It's an event. The sky puts on a show, and A-Bay provides the perfect front-row seat. I've spent countless evenings here with my camera, and I'm going to share everything I know to help you capture that perfect shot, whether you're using a professional camera or just the phone in your pocket.
Why A-Bay Sunsets are a Photographer's Dream
What makes this spot so special? It's the combination of incredible natural elements that all come together in one frame. You have the iconic, graceful silhouettes of the coconut palms. You have the ancient Kuʻualiʻi fishpond, which on a calm evening acts like a perfect mirror, reflecting all the sky's drama and doubling the color. You have the gentle curve of the bay itself, often with sailboats or outrigger canoes resting at anchor, adding a sense of story and scale. And if you're really lucky, you might even witness the legendary "green flash," a fleeting burst of green light right as the sun dips below the horizon. All these ingredients make A-Bay a photographer's paradise.
Finding Your Vantage Point: Three Classic A-Bay Shots
Where you stand makes all the difference. Here are my three go-to spots for three very different kinds of sunset photos:
📸 The Postcard Shot (South Side)
This is the iconic, money shot that you've probably seen in magazines. To get it, walk south from the main beach area, along the paved path that goes around the Kuʻualiʻi fishpond. Position yourself on the far side of the pond, looking back across it towards the bay.
From here, you can compose your shot with the palm trees in the foreground, their perfect, dark silhouettes reflected in the still water of the pond, and the fiery colors of the sunset over the ocean in the background. It's pure magic.
🌅 The "Golden Hour Vibe" Shot (Center Beach)
For a photo that captures the feeling and energy of the place, set up right on the main beach, perhaps near the Lava Lava Beach Club. Get down low and include other elements in your foreground.
Frame a shot with people laughing, kids playing in the sand, or one of the Waikoloa Canoe Club's outrigger canoes pulled up on the beach. This tells a story of a perfect evening on a Hawaiian beach and captures the lively, social atmosphere.
🌋 The Lava Rock Foreground Shot (North Side)
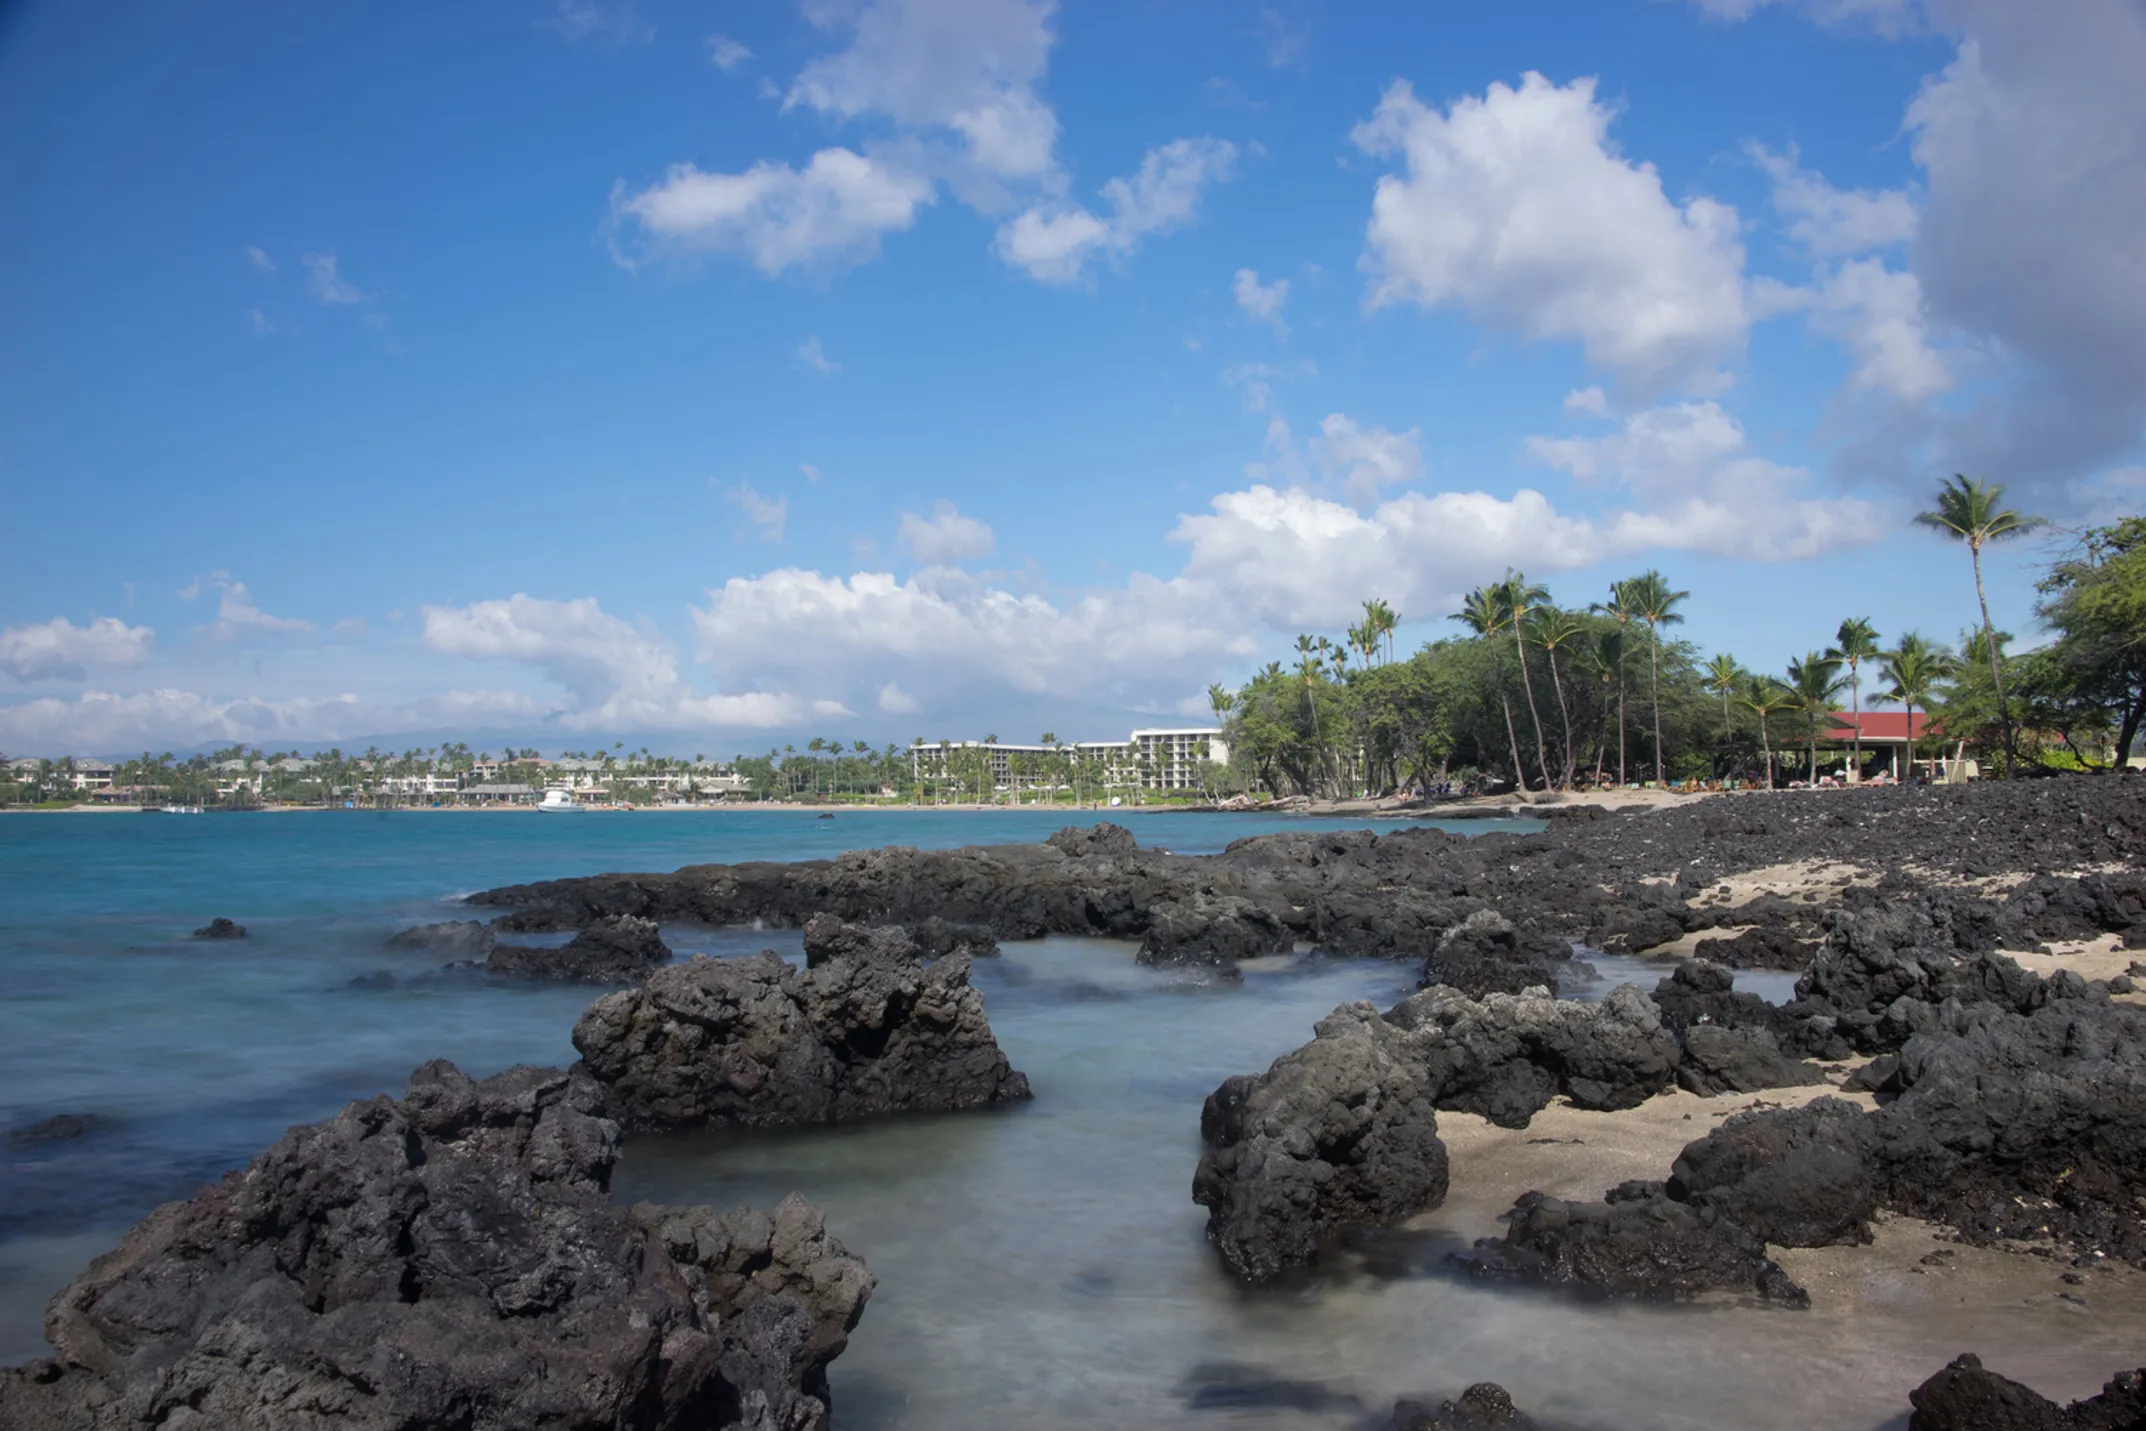
For a more dramatic and rugged look, take a short walk north from the main beach along the Ala Kahakai trail. You'll quickly find yourself among beautiful, dark lava rock formations along the coast.
Find a spot where you can use these interesting shapes and tide pools as a powerful foreground element. The contrast between the rough, dark lava and the soft, warm colors of the sky creates a photo with incredible texture and drama.
Kalani's Pro Tips for Any Camera (Even Your Phone)
You don't need a fancy camera to take a great sunset photo. It's all about technique.
Essential Photography Techniques
Composition is Key: Think about the Rule of Thirds. Instead of putting the horizon right in the middle of your photo, place it on the top or bottom third line. Use the trunks of the palm trees to create natural frames on the sides of your image. Look for leading lines—like the curve of the shoreline or the edge of the fishpond wall—to draw the viewer's eye into the picture.
Expose for the Sky: Here's the most important tip for getting those amazing, vibrant colors. Your camera wants to make everything evenly lit, but that will wash out the sunset. You need to tell it that the sky is the star. On a smartphone, it's easy: just tap your finger on the brightest part of the sky in your frame. You'll see a little sun icon appear. Now, slide that icon down just a little bit. This tells the camera to underexpose the photo. The foreground (like the palm trees) will turn into a dark silhouette, but the colors in the sky will become deep, rich, and saturated.
Create a "Sunstar": Want that cool effect where the sun looks like a multi-pointed star? It's easier than you think. Wait for the moment when the sun is just partially hidden by the horizon, a cloud, or even the trunk of a palm tree. On a dedicated camera, set your aperture to a high number, like f/16. This narrow opening will bend the light and create that sharp, beautiful starburst effect.
Don't Leave Early! This is the mistake almost everyone makes. They pack up as soon as the sun disappears below the horizon. Big mistake! The show is just getting started. The 15-20 minutes after the sun has set is called the "afterglow" or the "second sunset." This is often when the most spectacular colors appear, as the light from the sun, now far below the horizon, reflects off the high clouds, painting the entire sky in unbelievable shades of pink, purple, and deep orange. Be patient and wait for it.
Explore the Complete A-Bay Guide
Master sunset photography and discover the complete Anaehoʻomalu Bay experience from history to activities.
📱 Phone Photography
- Tap to Focus Tap brightest sky area
- Slide Down Lower exposure for rich colors
- Rule of Thirds Horizon on top/bottom third
- Stay for Afterglow 15-20 mins after sunset
📖 Complete Guide
📍 Best Photo Spots
Fishpond reflections
People & canoes
Lava rock drama
📷 DSLR Settings
Golden Hour:
f/4-f/8, ISO 100, 1/125s+
Sunstar Effect:
f/11-f/16, ISO 100, 1/60s
Afterglow:
f/8, ISO 200-400, 1-10s
💚 Green Flash
A rare phenomenon where a green burst of light appears just as the sun disappears below the horizon.
Best Conditions:
Clear horizon, calm weather
Advanced Techniques for the Photo Enthusiast
If you've brought a DSLR or mirrorless camera and a tripod, you can unlock some truly professional-level shots.
Long Exposure & Misty Water
This is how photographers get that dreamy, silky look on the water. You'll need a tripod to keep your camera perfectly still and a strong Neutral Density (ND) filter (like a 10-stop ND filter). An ND filter is like dark sunglasses for your lens. It blocks out so much light that you can leave your shutter open for a long time, even when it's still bright out. Set your camera on the tripod, compose your shot, and set your shutter speed to something long, like 30 seconds. As the waves wash in and out during that time, their motion will blur into a beautiful, misty, ethereal layer on the ocean's surface.
Balancing the Scene with Filters
The biggest challenge in sunset photography is the huge difference in brightness between the glowing sky and the dark foreground. A professional tool to solve this is a Graduated Neutral Density (GND) filter. Think of it as a filter that's dark on top and clear on the bottom. You align the dark part with the sky, which holds back its brightness, allowing you to get a perfect exposure on both the sky and the foreground in a single shot, without having to resort to heavy editing later.
Sunset Photography Cheat Sheet
This can be a lot to remember, so here's a quick guide you can even pull up on your phone while you're on the beach:
Golden Hour (30-45 mins before sunset)
Goal: Capture warm, soft light on people or landscape
Phone Tip: Face your subject toward the setting sun for beautiful light
DSLR/Mirrorless Settings: f/4-f/8, ISO 100, Shutter 1/125s+
Key Gear: -
Sun on Horizon (The main event)
Goal: Get vibrant colors and a potential sunstar
Phone Tip: Underexpose by tapping the sky and lowering brightness
DSLR/Mirrorless Settings: f/11-f/16, ISO 100, Shutter 1/60s (for sunstar)
Key Gear: Tripod recommended
Afterglow (5-20 mins after sunset)
Goal: Capture the deepest pinks and purples
Phone Tip: Use Night Mode or hold very still. Prop phone on something
DSLR/Mirrorless Settings: f/8, ISO 200-400, Shutter 1-10 seconds
Key Gear: Tripod is essential
Misty Water Effect (Anytime during sunset)
Goal: Create silky, smooth water
Phone Tip: Not possible on most phones without special apps
DSLR/Mirrorless Settings: f/9, ISO 100, Shutter 30-60 seconds
Key Gear: Tripod & 10-Stop ND Filter


