The Lookouts: From Iconic Vistas to Unmarked Pullouts
Every Major Lookout Plus the Secret Spots the Signs Don't Tell You About

Written by a Local Expert
Leilani AkoThe drive up Kokeʻe Road is a journey of unfolding beauty, with each lookout offering a unique personality and perspective. Here's a deep dive into the main stops and the secret spots in between.
The Four Main Lookouts: A Deep Dive
Waimea Canyon Lookout (Mile Marker 10)
This is the grand introduction, the first official stop where the sheer scale of the canyon truly hits you. From the viewing platform, you get a sweeping panorama of the canyon's interior, with its crested buttes and deep, colorful gorges. This lookout has a large parking lot and restrooms, and it's where many people first pay their park fees.
🚧 CLOSURE ALERT (July-Dec 2025)
The main Waimea Canyon Lookout will be completely closed from July 14, 2025, through early December 2025 for safety improvements. This closure will be in effect 24/7, including weekends.
📸 My Photo Tip
This is the spot for your classic, wide-angle landscape shot. I try to compose the photo with the Waimea River visible as a silver ribbon leading the eye deep into the canyon. If you look far to your left, you can just make out the two delicate tiers of Waipoʻo Falls cascading down the opposite cliff face.
Pu'u Hinahina Lookout (Mile Marker 13)
Offering a distinctly different angle, Puʻu Hinahina looks down the length of the canyon toward the sea. It's a breathtaking perspective that highlights the canyon's immense depth. This is also the primary trailhead for the popular Canyon Trail, which leads to the top of Waipoʻo Falls.
🔍 Secret View: Ni'ihau Lookout
Don't miss the secondary path! While most visitors flock to the main canyon overlook, a short trail to the right of the parking area leads to the Niʻihau Lookout. On a clear day, you can see the faint silhouette of the "Forbidden Island" of Niʻihau on the horizon.
📸 My Photo Tip
The light here is often best in the late afternoon. The low angle of the sun creates deep, dramatic shadows that sculpt the canyon's ridges, adding incredible texture to your photos. You'll likely need a telephoto lens to get a clear shot of Niʻihau.
Kalalau Lookout (Mile Marker 18)
Prepare for a dramatic shift. As you round the bend to this lookout, the fiery reds of the canyon give way to the jaw-dropping, emerald-green cliffs of the Kalalau Valley. These are the legendary pali (cliffs) of the Nā Pali Coast, seen from nearly 4,000 feet above the valley floor. This is one of the most sacred and revered landscapes in all of Hawaiʻi.
☁️ My Tip: Be Patient with the Clouds
This lookout is famously prone to being completely obscured by clouds. My best advice is to be patient. If you arrive and can't see anything, don't just turn around. Wait 15 or 20 minutes. The weather here is incredibly fickle, and a wall of white mist can part in an instant to reveal a view that will stay with you for a lifetime.
📸 My Photo Tip
Sunset from this spot can be a truly spiritual experience. The valley fills with a soft, golden light, and the tourist crowds have long since departed, leaving you in near-total silence. It's a gamble with the clouds, but if you win, the reward is unforgettable.
Pu'u o Kila Lookout (End of the Road, Mile Marker 19)
Just one more mile up the road lies the grand finale. The Puʻu o Kila Lookout offers what I consider the most complete and unobstructed view of Kalalau Valley. The perspective is slightly higher and wider than the lower lookout, with less foliage getting in the way of your shot. This is also the starting point for the Pihea Trail, which skirts the rim of the valley.
📸 My Photo Tip
This is the money shot. Because the view is so expansive, a polarizing filter is your best friend here. It will help cut through the atmospheric haze, deepening the blues of the ocean and sky and making the greens of the valley pop with incredible vibrancy.
Beyond the Signs: Unofficial Views & Secret Spots
Some of the canyon's best views aren't marked. Keep your eyes peeled for these spots.
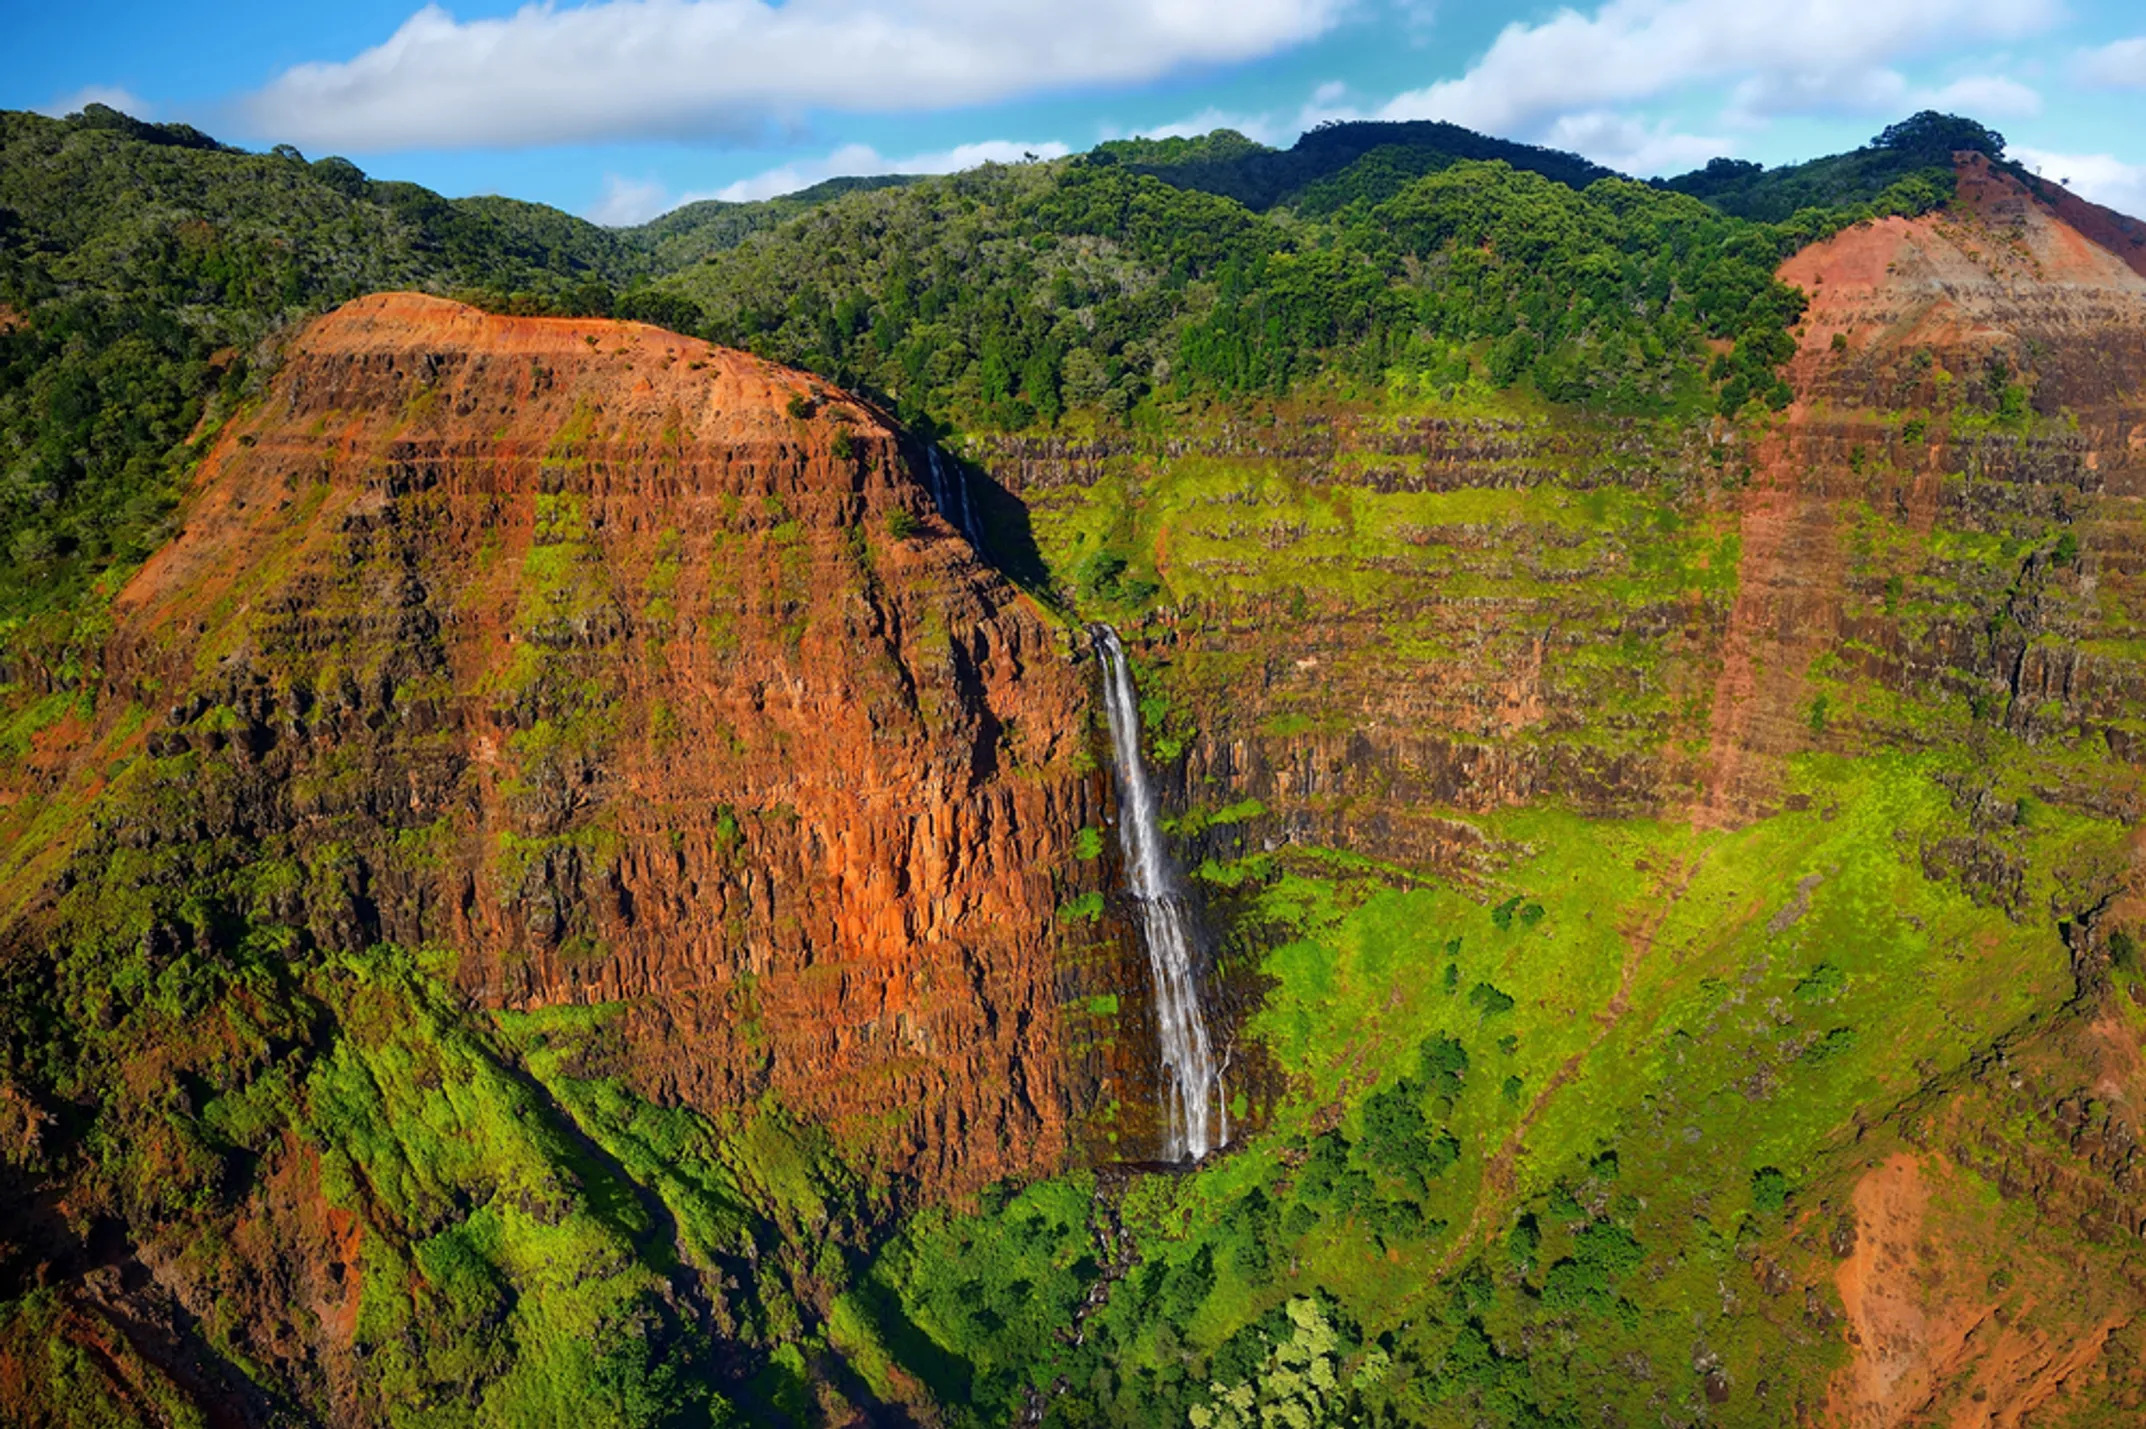
🌊 The Best View of Waipo'o Falls: Pu'u ka Pele Lookout
Many visitors are disappointed they can't get a good view of the 800-foot Waipoʻo Falls. Here's the secret: the best roadside view is from the Puʻu ka Pele Lookout, an unmarked picnic area and pullout located between mile markers 12 and 13.
You have to park and walk across the street for the view. While you can see the falls as a thin ribbon from the main Waimea Canyon Lookout, this spot gets you significantly closer, allowing you to appreciate the scale of the two-tiered cascade.
Local Knowledge: This is a key piece of insider information that most guides miss. It's the best spot to photograph the falls from across the canyon!
🏔️ The Red Dirt Waterfall (Around Mile Marker 3)
Early in your drive up, you'll see a unique waterfall flowing over a canvas of brilliant red earth—a photographer's delight.
My Knowledge: It's beautiful, but it's not entirely natural. This waterfall is actually runoff from an old irrigation ditch system built during the sugar plantation era. This is why its flow is inconsistent; sometimes it's a rushing cascade, and other times it's completely dry. It's a great photo op when it's running, but don't be surprised if it's not there.
⚠️ For the Truly Adventurous: The Kalepa Ridge Trail
This is a secret I share with a serious warning. The Kalepa Ridge Trail is an unofficial, unmaintained, and strenuous path that begins at a break in the fence to the left of the Kalalau Lookout.
⚠️ SERIOUS WARNING
This is not a state-sanctioned trail and should only be attempted by highly experienced hikers who are comfortable with extreme exposure, narrow ridges, and steep, thousand-foot drop-offs on both sides. It is incredibly dangerous, especially when it's windy or the ground is wet and muddy.
That said, for those with the skill, experience, and nerve, the reward is an intimate, spine-tingling view of the Nā Pali Coast that is simply without equal on foot. You are literally walking on the knife-edge of the world.
Photography Tips for Every Season and Time of Day
Capturing the beauty of Waimea Canyon requires understanding how light interacts with this unique landscape throughout the day and year.
🌅 Golden Hour Magic
The hour after sunrise and before sunset offers the most dramatic lighting. The low angle of the sun creates long shadows that emphasize the three-dimensional nature of the canyon walls and ridges. The warm light brings out the rich reds and oranges while creating beautiful contrast with deep purple shadows.
☀️ Midday Challenges
While midday light is often harsh for landscape photography, the canyon's depth means interesting shadows and light patterns occur throughout the day. The key is to look for compositions that use the interplay of light and shadow rather than trying to capture everything evenly lit.
⛈️ Storm Photography
Don't pack up your camera when storms roll in! Some of the most dramatic canyon photos capture the interplay of sunlight and storm clouds, with shafts of light breaking through to illuminate specific ridges or valleys. Always prioritize safety, but stormy conditions often produce the most memorable images.
📷 Equipment Recommendations
A polarizing filter is invaluable for cutting through atmospheric haze and intensifying contrast. A graduated neutral density filter can help balance exposure between bright sky and darker canyon depths. For wildlife, a telephoto lens helps capture native birds without disturbing them.
Composition Techniques
Use the canyon's natural lines and curves to lead the eye through your photographs. The winding river, ridge lines, and waterfall paths all create natural leading lines. Don't forget to include foreground elements like native plants or interesting rock formations to add depth to your compositions.
Continue Your Waimea Canyon Deep Dive
Back to Waimea Canyon Overview
← Overview🏞️ Main Lookouts
- Mile 10:
Waimea Canyon Lookout
- Mile 13:
Pu'u Hinahina + Ni'ihau
- Mile 12-13:
Pu'u ka Pele (Falls View)
- Mile 18:
Kalalau Lookout
- Mile 19:
Pu'u o Kila (End of Road)
🏔️ Waimea Canyon Guide
🗺️ West Side Guide
📸 Photo Tips
- Use polarizing filter for haze
- Golden hour: sunrise & sunset
- Don't skip stormy weather shots
- Include foreground elements